Pages

Wednesday

How to fix incompatibility problems between Internet Explorer 8 and the Google Toolbar

Option 1: Update to the latest Google Toolbar
To update to the latest Google Toolbar, follow these steps:
  1. Visit the Google Toolbar site to download and install the latest version of the Google Toolbar. This will resolve this issue. Click the following link to visit the Google Toolbar Web site:Download the Google Toolbar now
  2. Close all Internet Explorer windows after you install the update.

Option 2: Disable the Google Toolbar
To disable the Google Toolbar, follow these steps:
  1. Close all Internet Explorer windows.
  2. Open a new Internet Explorer window. You will see a dialog informing you that the ‘Google Toolbar' add-on can cause Internet Explorer to crash or to stop responding.
  3. Click Always open Internet Explorer without this add-on.
After you do this, Internet Explorer 8 will not load the Google Toolbar when it starts.

How to uninstall Internet Explorer 7

When you uninstall Windows Internet Explorer 7, Internet Explorer 6 is automatically restored on your computer. This article describes how to confirm that Windows Internet Explorer 6 is restored properly.

Step 1: Uninstall Internet Explorer 7
Click Start, and then click Run.
In the Open box, type appwiz.cpl, and then click OK. It may take several seconds for your computer to compile a list of programs.
Scroll down through the list and click Windows Internet Explorer 7, and then click Remove.
Back to the top

Step 2: Verify that Internet Explorer 6 is restored
To verify that Internet Explorer 6 is restored, follow these steps:
Click Start, and then click Run.
In the Open box, type iexplore. Windows Internet Explorer opens.
On the Help menu, click About Internet Explorer. The About Internet Explorer window opens.
If the Version number begins with 6, you have successfully uninstalled Internet Explorer 7 and restored Internet Explorer 6.

Reset Internet Explorer 7 settings

Resetting Internet Explorer's settings is not reversible. After a reset, all previous settings are lost and cannot be recovered. Rather than resetting everything, you might want to reset specific settings or delete your webpage history.


1. Close any Internet Explorer or Windows Explorer windows that are currently open.
2. Open Internet Explorer by clicking the Start button , and then clicking Internet Explorer.
3. Click the Tools button, and then click Internet Options.
4. Click the Advanced tab, and then click Reset.
5. In the Reset Internet Explorer Settings dialog box, click Reset.
6. When Internet Explorer finishes applying default settings, click Close, click OK, and then click OK again.
7. Close Internet Explorer.
Your changes will take effect the next time you open Internet Explorer.

You cannot open a new Internet Explorer window or nothing occurs after you click a link

To resolve this problem in Internet Explorer, follow these steps:

  • Quit all programs that are running.
  • Click Start, and then click Run.
  • Type regsvr32 urlmon.dll, and then click OK.
  • When you receive the "DllRegisterServer in urlmon.dll succeeded" message, click OK.
If this does not resolve the problem, repeat steps 2 through 4 for each of the following files (in step 3, replace Urlmon.dll with each of the file names below):
Shdocvw.dll
Actxprxy.dll
Oleaut32.dll
Mshtml.dll
Browseui.dll
Shell32.dll
Windows XP and Windows 2000 only
Restart the computer to enable the changes to take effect.

If the problem is still not resolved, verify that the following registry values are present and correct:
  • HKLM\SOFTWARE\Classes\Interface\{00020400-0000-0000-C000-000000000046}
Name: (Default)
Value: IDispatch
  • HKLM\SOFTWARE\Classes\Interface\{00020400-0000-0000-C000-000000000046}\ProxyStubClsid
Name: (Default)
Value: {00020420-0000-0000-C000-000000000046}
  • HKLM\SOFTWARE\Classes\Interface\{00020400-0000-0000-C000-000000000046}\ProxyStubClsid32
Name: (Default)
Value: {00020420-0000-0000-C000-000000000046}


If the problem is still not resolved, reinstall Internet Explorer. If you are using the version of Internet Explorer that is included with your operating system, reinstall or repair your operating system.

Saturday

Resize screen fonts on the fly in Internet Explorer

Here's a simple useful tip that you can use in Internet Explorer. While viewing a web page, hold down CTRL and use the scroll button on your mouse to increase or decrease the size of the fonts on the page. Some websites really like using the small size 1 fonts, and if you're eyes have a hard time reading such small text, this little trick can make previously headache ridden websites much easier to read through.

Friday

Turn autocomplete off in IE

By default, Windows XP and Internet Explorer 6 will examine what you are typing in the address bar and pop up a list of similar entries you entered recently. It also stores entries you have made on web documents and forms, including usernames and passwords. While this can help speed up your web surfing experience, it can also potentially compromise your privacy if multiple people are using the same user account on your system. Fortunately, autocomplete can be easily disabled through the IE options menu.

To do this: From Internet Explorer, go to the Tools menu, then select 'options.' Choose the 'content' tab, then click the 'autocomplete' button.


Disable the various options as you see fit. You can also clear autocomplete's memory cache for web forms and passwords from this window.

Create a password reset disk

Here's an important tip… If you are using a password protected user account in Windows XP (and you really, really should be ) you might be nervous about forgetting your password. Well here's a way to put your mind at ease, at least a little bit. Windows XP allows users to create a password reset disk specific to their user account. This disk can be used at the welcome screen to reset your password in the event that you do forget it.

To create the disk: Go to start\control panel\user accounts. Select the account you are currently logged in as.

Under the 'related tasks' heading in the top left corner, click 'prevent a forgotten password' to open the forgotten password wizard. Insert a blank floppy disk and follow the instructions to create your password reset disk.

To use the password reset disk in case of emergency:

Once you have created a password reset disk for a specific user, the next time the password for that user is entered incorrectly at the welcome screen, a message will pop up asking if you have forgotten your password. At this point you can elect to use your password reset disk. Follow the instructions to reset your password.

Note: There are a couple of possible problems with the above procedure. For one, if you have used Windows XP's built in encryption feature to encrypt some of your files and folders, but have not yet updated to service pack 1, do not reset your password, as you will lose access to all the encrypted data. Once you have got service pack 1, it is safe to use the disk. Also, you cannot gain access to the reset feature if you have disabled the welcome screen on XP by using tip #31 above.

Keep your reset disk in a safe location, because anyone else can also use it to reset your password....

Hosting online games through the Windows XP firewall

If you are using the Windows XP firewall and you wish to host an online game such as Quake 3, or other applications that require users on the Internet to contact your computer directly, you will need to customize your firewall slightly to allow these specific communications through. Fortunately the XP firewall makes these changes fairly easy to do.

To customize your firewall: Go to 'start\control panel\network connections'. Right click on the network connection that has the firewall enabled and go to 'properties.' Choose the 'settings' button at the bottom. On the 'services' tab, click the 'add' button.


This window will add the application that you are using to the firewall's list of data that is allowed into your computer.

You will need to find out the port that your application uses. This information should be available from the documentation or from the software manufacturer's website.

Input a description for your convenience, then the computer name or IP address of the computer that is hosting the program, then put the port number that the program uses. Note that as long as the program is running on the computer that uses the XP firewall, the internal and external port will be the same.

Click 'ok' to apply the rule. Your firewall will now allow connections through the port you specified.

Create a link to shutdown your PC

To create a useful link desktop link to shutdown or restart your PC, follow these directions:

Right click on an empty area of your desktop, then select 'new' and 'shortcut' to open the new shortcut wizard.

When prompted for the location of the shortcut, enter 'SHUTDOWN -s -t 01' to shutdown the system or 'SHUTDOWN -r -t 01' to restart the system.

Name the shortcut and give it an appropriate icon from the '%SystemRoot%\system32\SHELL32.dll' location.

You now have a quick shortcut to shutdown or restart your system! Perfect for getting out of the office right at 5:00PM on the dot!

Quick Edit in the Command Prompt

The Quick Edit function allows you to cut and paste text to and from the command prompt window, something which you may have become used to not being able to do.

To activate Quick Edit: Open a command prompt Window ('start\run' and type 'cmd'). Right click on thetoolbar at the top and select 'properties.' Put a checkmark in the Quick Edit mode box. When prompted, opt to apply changes to all similar windows.

Now that Quick Edit is enabled in the command prompt, you can click and drag to highlight text, then press ENTER to copy it to the clipboard. To paste text from the clipboard, simply right click on the command prompt window.

Compressing files and folders to save space

Windows XP includes a built in compression utility which can save you some valuable space on your hard disk by archiving little used files. Working similarly to compression programs such as PKZIP and WINRAR, the built in software reduces the space your files take up on the disk at the penalty of increased disk access time for the compressed files in question. There are several ways of compressing data on your system:

If you have a pre-existing folder and would like to compress everything in it, right click on the folder, select 'properties' then the 'advanced' button at the bottom. In the 'compress or encrypt attributes' section, check the 'compress contents to save disk space' option.

If you wish to create a compressed folder for a file or folder separate from the one it is in now, right click on the item you wish to compress and choose 'send to\compressed (zipped) folder.' This will create a new compressed folder in the same location as the original file or folder.

Use remote desktop to connect to your PC from anywhere

Windows XP Professional includes Microsoft's remote desktop software, which can be used to access your computer from anywhere you have Internet access. Not only can you access your system, you can actually see and manipulate the desktop environment just as if you were seated in front of the system.

Let's look at how to do this: In order to use Remote Desktop to connect to your home computer remotely, it must first be enabled. Right click on 'my computer' then select the 'remote' tab, and check the box entitled 'allow computers to connect remotely to this computer.'

Note: please ensure that all of your user accounts are using proper passwords before you enable this option, otherwise anyone with internet access and a Windows system can theoretically access and control your computer.
Using the 'select remote users' button, you can select user accounts that have access to the computer remotely. All members of the administrators group (that is, the built in 'administrator' account and any users who were added during the install process) are allowed remote access automatically.

Now you can install Remote Desktop Web Connection if you wish. This allows client computers to access the remote desktop through Internet explorer, eliminating the need to download and install the (freely available from Microsoft) 'Remote desktop client' program.

Insert the Windows XP Professional CD and select 'install additional windows components. Highlight 'internet information services (IIS)' and click 'details.' Highlight 'world wide web services' and click 'details.' Now put a check beside 'Remote desktop web connection,' hit 'ok' twice and then 'next' to install.
Now to connect to the remote desktop from any client computer with Internet Explorer 4 or better installed, simply type 'http://(IP address of your home computer)/tsweb' to bring up the web connect dialog screen.

Mount a new hard drive as a folder in your C: drive

Actually, this tip works for any partition of any NTFS formatted drive (except the partition with the Windows system files on it)… Windows XP, like 2000 before it, allows you to 'mount' drives as folders in a pre-existing logical drive. For example, if you had a computer with a 20GB disk formatted into a single partition and volume (drive c:), you could purchase a second drive, partition and format it from disk manager and then instead of giving it its own drive letter, add it to your c: drive as a directory. Any files added to that directory would of course be stored in the new HD.

This can come in extremely handy, as certain applications (databases come to mind) can grow extremely large, but may not support storing data on a (logically) separate drive.

As far as Windows is concerned, a drive mounted as a directory is just a directory, so no extra drive letters are involved. This can also cut down on storage confusion for the average user, and it's easy to do, though it can only be done with NTFS formatted partitions, and obviously the boot partition cannot be used this way, though other partitions can be added to the boot partition.

Also note that shuffling the partition around in this way has no effect on the data stored in it. You can move an NTFS partition from directory to directory, then give it back a drive letter if you choose, while maintaining complete access to the data inside. No reboot is necessary. One other note: If you have installed software on a partition you plan to mount as a directory, it is best to uninstall and reinstall it, since the move may stop the software from working correctly. Windows will warn you about this if you forget my wise words.
To mount a partition as a directory: Open disk manager, the right click on the partition you wish to mount as a directory in the graphical partition window (lower pane). Select 'change drive letter and paths…'

Remove the current option (if any), then click add.

Choose the 'mount in the following empty NTFS folder,' browse to the desired volume and add a directory for your drive. Click 'ok.' That's it.

If you wish to return things back to the way they were, simply repeat the procedure, removing the directory location and choosing a drive letter instead. The data on the drive will be unharmed.

Resize screen fonts on the fly in Internet Explorer

Here's a simple useful tip that you can use in Internet Explorer. While viewing a web page, hold down CTRL and use the scroll button on your mouse to increase or decrease the size of the fonts on the page. Some websites really like using the small size 1 fonts, and if you're eyes have a hard time reading such small text, this little trick can make previously headache ridden websites much easier to read through.

Enable clear type

Windows XP allows you to enable Microsoft's Clear Type font smoothing method. This blends the colours at the edges of type on screen, causing the letters to appear less jagged. While it is primarily intended to increase text quality for users of laptops and desktop PCs with LCD (flat panel) screens, it is worth experimenting with even if you use a traditional CRT.

Be advised that certain ClearType settings may appear rather blurry on a CRT monitor. If you use an LCD monitor on a laptop or desktop, you should definitely enable Cleartype as the increase in text quality is considerable.

To activate ClearType: Go to 'control panel\display' and select the 'appearance' tab.

Click the 'effects' button. Ensure that the 'use the following method to smooth the edges of screen fonts' box is checked and change the drop down box to 'ClearType.' Press 'OK.'

Once you have enabled cleartype, Microsoft has provided a web location where you can fine-tune your ClearType settings. Here it is the link.

18. Create a keyboard shortcut to a folder or program

Shortcuts to programs are very convenient, but only if they are easily accessible. It can be a pain to have to minimize the window you are currently working in just to locate the shortcut you are looking for.

To make things easier, XP features the ability to link shortcuts to user-defined key combinations, so you can easily activate the one you are looking for without disrupting what you are doing.

Unfortunately this only works for shortcuts that are placed directly on the desktop, not in other folders, but it's still a useful little tip.

To do it: Select the folder or program icon that you wish to use. Create a shortcut for it by right clicking on the item and selecting 'create shortcut' from the menu.

Place your newly created shortcut on the desktop by dragging or cut/pasting. Right click the shortcut and select 'properties.'

Select the 'shortcut' tab and enter the key combination you wish to use (XP will automatically edit the combination if it is not acceptable. Just entering 'e' for example, will get you an actual key combination of ctrl + alt + e). Click 'ok.'

Wednesday

Windows XP Disk Defragmentation

"Disk defragmentation describes the process of consolidating fragmented files on your computer's hard disk.
Fragmentation happens to a hard disk over time as you save, change, or delete files. The changes that you save to a file are often stored at a location on the hard disk that's different from the original file. Additional changes are saved to even more locations. Over time, both the file and the hard disk itself become fragmented, and your computer slows down as it has to look in many different places to open a file.

Disk Defragmenter is a tool that rearranges the data on your hard disk and reunites fragmented files so your computer can run more efficiently. In this version of Windows, Disk Defragmenter runs on a schedule so you don't have to remember to run it, although you can still run it manually or change the schedule it uses."

"Fragmentation makes your hard disk do extra work that can slow down your computer. Disk Defragmenter rearranges fragmented data so your hard disk can work more efficiently."

Run WinTools.net and press Defrag button:
Disk Defragmenter

"Disk defragmentation describes the process of consolidating fragmented files on your computer's hard disk.
Fragmentation happens to a hard disk over time as you save, change, or delete files. The changes that you save to a file are often stored at a location on the hard disk that's different from the original file. Additional changes are saved to even more locations. Over time, both the file and the hard disk itself become fragmented, and your computer slows down as it has to look in many different places to open a file.

Disk Defragmenter is a tool that rearranges the data on your hard disk and reunites fragmented files so your computer can run more efficiently. In this version of Windows, Disk Defragmenter runs on a schedule so you don't have to remember to run it, although you can still run it manually or change the schedule it uses."

"Fragmentation makes your hard disk do extra work that can slow down your computer. Disk Defragmenter rearranges fragmented data so your hard disk can work more efficiently."

Run WinTools.net and press Defrag button:

Disable Indexing on Drives:

Click on My Computer. Right-click on any disk you do not want to be Indexed. In the General tab uncheck Index this drive for faster searching and click Apply.

Disabling XP Indexing

In the resulting window choose Apply changes to drive X:\, subfolders and files, click OK and ignore everything for any error messages.
Disabling XP Indexing
Do it for all hard disks.

Disabling Windows XP Indexing:

The usefulness of Windows Search Indexing is disputable enough. You lose PC performance, a part of free RAM memory and the speed access to Hard Drive(during the work of the Search Indexer) for possibility to fast search of a file on your hard drive. It is possible to disable and turn off search indexing to speed up system speed by freeing up CPU and the memory which is used to performing the indexing task. Disabling does not mean you can't use Windows Search but it does mean that the searches will take more time. To disable it:

Disable Search Indexing Service:


Run WinTools.net and select System Services point of MS Tools menu:

Disabling XP Indexing

Or press Windows + R buttons of your keyboard, type services.msc and press OK.
Disabling XP Indexing

In the list of Services mouse double click on the Indexing Service entry. In a popped up dialog press Stop button, select Startup type: Disabled to permanently disable the indexing service so that it won`t run again and press Apply button.


Disabling XP Indexing

Unused Files

One of the most common causes of slow disk performance is the presence of lots of small files, which are often unused. Major culprits include the IE browser cache and Windows temporary file directories. Use the XP Disk Cleanup tool (Accessories menu, System Tools) often:


The Disk Cleanup utility can take a while to run on laptops when you execute it for the first time, so be prepared to sit around for a while, or maybe a read a good book. However subsequent cleanups will run much quicker if you perform this task regularly.

The Disk Cleanup utility will empty your Internet Exploder cache, but if you use the Firefox browser, you'll have to empty its cache manually. On the Tools menu, select Options then select the Privacy tab. In the Private Data group, click Clear Now... then click Clear Private Data Now. Make sure that you don't clear passwords unless you really want to do that:


Removing unused or unwanted files before executing a defragmentation can free up space that will be better occupied after a defrag, this is because files will load faster if they are located closer to the start of the drive.

Keeping your Machine Well-Oiled and Greased

When files are stored on disk they are stored in blocks. A set of blocks can be contiguous or fragmented. Contiguous means adjacent. A contiguous file is composed of a sequence of blocks that is stored in an unbroken chain. A fragmented file has gaps in the block sequence, and the gaps are usually occupied by blocks that belong to other files. If a file is fragmented, or non-contiguous, the hard disk has to skip expanses of blocks as it tries to read a file from start to end, which means that fragmented files cause slower performance.

A fragmented hard disk is a disk that has a lot of fragmented files. A defragmented hard disk means faster read/write access, which, in turn, means better overall disk performance.

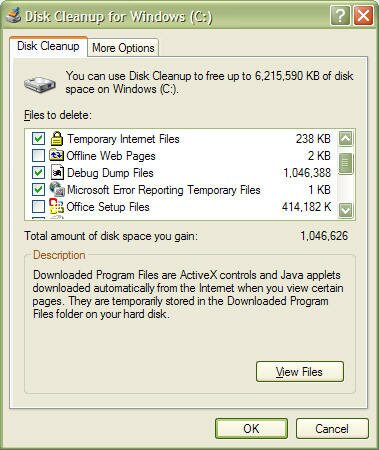
Regularly defragment your hard disk, every week if necessary, and certainly at least once a month. Also defrag your disk after deleting a large number of files, cleaning out your browser cache, uninstalling applications, or after using the Windows Disk Cleanup Utility.

The Windows XP Disk Defragmenter is a crippled version of a commercial product called "DiskKeeper" and has a number of limitations:
The User Interface is not intuitive.
The defragmentation process is rudimentary at best.
Large gaps are left between individual files, i.e. the disk is not compacted.
It can only defragment one volume at a time.
It cannot be run on a schedule
While the built-in XP defragmenter is ok for average users, power users who need more from a defragmenter might consider looking at UltraDefrag, which is an Open Source defragmenter for Windows that supports both x32 and x64 versions of XP and Vista. UltraDefrag offers:
Very fast defragmentation, the work is done via a kernel mode driver that has an optimal defragging algorithm.
Very small engine written in pure C.
The full download is under 200k in size.
Nice graphical interface, which is both compact and functional.
Safe, because file moving is accomplished with Microsoft's own Defrag API.
Simple to use.
Can generate html reports of fragmentation status.
Can include/exclude files based on simple filters.
Free: Distributed with full source code under the GNU General Public License.
Has a Compact option to remove gaps between files
If you decide to use defragmentation as a performance-enhancing tool then also download and install Microsoft's PageDefrag tool. Most defragmenters cannot defragment pagefiles and registry hives because those files are open while the defragmenter is running. If you want to optimise your pagefile and other system files, especially if you have only a single hard disk, then this tool is highly recommended.

Turn off themes and visual effects.

As ridiculous as that sounds, if you want a very responsive user interface because you are more interested in getting work done than looking at XP's Fisher-Price graphics, then turning off themes and visual effects has got to be the best idea since sliced cheese spread. You might not like what you see, but it will be faster.

You can disable all of XPs visual effects by right-clicking the Desktop and selecting the "Properties" menu item, select the "Appearance" tab. In the dropdown box under "Windows and buttons", choose Windows Classic style.

Processor Scheduling

his tweak is impossible to explain without getting into the technical ins and outs of binary values, bit pairs and bit masks. Suffice it to say, it forces short, variable length processor timeslices to be allocated to foreground processes three times more often than those timeslices given to background processes.

Start regedit and navigate to the following key:

[HKEY_LOCAL_MACHINE\SYSTEM\CurrentControlSet\Control\PriorityControl]

Change the value of Win32PrioritySeparation to 26 hexadecimal, which is 38 decimal, save the changes and reboot.

As with the cache tuning tweak (#4), this particular tweak should not be applied to a system that is running either SQL Server or Internet Information Server (IIS) unless you are certain that you want to slow down those background processes.

Disable Last Access Timestamp

Whenever XP reads a file, it stamps the file with the date and time that you accessed it. This feature has its place but is not required for normal use unless you rely on the date of last access for backup purposes, which is a rare requirement for most backups. Putting a timestamp on a file that has just been read means that a write access has to be made to disk, so every time a read is executed, a corresponding write is also executed.

To disable the last access timestamp behaviour, start a command prompt, enter the following command then reboot;

FSUTIL behavior set disablelastaccess 1

Those of us who read and write Her Majesty's English need to take note of the American spelling of the BEHAVIOR parameter. To turn timestamps back on, repeat the command but replace 1 with 0;

FSUTIL behavior set disablelastaccess 0

Tuesday

Fix Broken and Slow Tab Issues in Internet Explorer 8

Some users that upgraded to Internet Explorer 8 experience issues with tabs not working properly or taking a very long time to load. It seems for most users the issue can be attributed to a problem with actxprxy.dll not installing properly during the upgrade. If you have a similar problem with IE8, fixing the issue is as simple as a running one command.

Just open up an administrative level command prompt and type in regsvr32 actxprxy.dll and hit Enter. Reboot your computer and your tab issue should be resolved.

Speed up web browsing with OpenDNS

When you type in a domain name such as wingeek.com in your browser the computer must resolve the friendly name into an IP address of the server to download the web page and supporting files. Windows uses a DNS (domain name system) server to lookup this information. By default, Windows uses your ISP’s DNS server. Depending on your provider, the performance of their DNS resolving server varies. Some large national providers are known to provide unreliable and slow DNS servers.

The performance of the DNS server you are using is one component that affects the speed of your internet browsing. Since each domain name you type in must be resolved into an IP address, the amount of time that takes will delay the loading of any web page. Some users with overloaded ISP DNS servers can see delays in multiple seconds before web pages start to load.

OpenDNS provides free alternative DNS servers that anyone can use with any internet provider. Unlike many national internet providers, OpenDNS’s DNS servers are very fast and reliable. Using OpenDNS servers instead of your ISP servers will help you speed up your internet browsing by cutting down on the delay between resolving a domain name and getting the IP address so your browser can start loading the web page.

Configuring your computer to use OpenDNS servers instead of your ISP’s is a simple change that works in both Windows XP and Windows Vista:

Click on the Start Button and type in ncpa.cpl and hit Enter. In Windows XP Click on the Start Button, click Run and then type in ncpa.cpl
Right click on your active network connection that you use to connect to the Internet and select Properties.
On the Networking / General tab, select Internet Protocol (TCP/IP) (version 4 on Windows Vista & 7) and hit Properties.
On the properties screen, select Use the following DNS server addresses and then type in 208.67.222.222 in the preferred and 208.67.220.220 in the alternate boxes.
Hit OK twice and you are finished.

Share Your Screen with SharedView

Microsoft SharedView is a free utility that allows you to share your desktop, applications and documents with up to 15 people online at a time. It is perfect to hold a small meeting or to show a family member how to do something. Best of all it works well through firewalls and routers so you don’t have to worry about connection issues.

Getting Microsoft SharedView up and running requires a Microsoft Live ID, broadband connection and a short download.

Click here to download SharedView

Once downloaded and installed just start up the utility from the start menu and sign in. Then click Start a new session and send your participants the link and details provided. Finally,click the Start button to start your meeting/event.

After the meeting has started you need to share something for your participants to view. Click the Share button on the top of the screen and select the app you want to share. You can also select your entire desktop on the bottom of the list.

Once selected click the Start button to begin sharing.

Saturday

Remote Assistance and Remote Desktop Sharing

Remove Remote Assistance and Remote Desktop Sharing.

Take note: Remote Desktop Sharing is not available with Windows XP Home. You may request assistance from someone only using Windows XP Pro.

Where do you find it?

With the default Category Control Panel:

Head to
Start
Select
Control Panel
Select
Performance and Maintenance
Select
System
Select
Remote Tab
Uncheck both "
Remote Assistance and Desktop Sharing" options
Select the
Ok button to apply the settings

With the
Classic Control Panel:

Head to
Start
Select
Control Panel
Select
System
Select
Remote Tab
Uncheck both "
Remote Assistance and Desktop Sharing" options
Select the
Ok button to apply the settings

Search history and settings: Enabling cookies

Google Chrome

To adjust cookies and other settings in Google Chrome, please review the information in the Google Chrome Help Center.

Firefox 2 or 3

Click the Tools menu.
Select Options.
Click the Privacy tab.
Select the 'Accept cookies from sites' checkbox.
Click the OK button.

Internet Explorer 6 or 7

Click the Tools menu.
Select Internet Options.
Click the Privacy tab.
Click the Default button (or manually slide the bar down to 'Medium').
Click the OK button.

Safari 3

Click the Safari menu.
Select Preferences.
Click Security.
In the 'Accept Cookies' section, select Always.
Click OK.

Friday

Nokia Codes Tips and Tricks

To check the IMEI (International Mobile Equipment Identity) Type-
*#06#
Information you get from the IMEI-
XXXXXX XX XXXXXX X
TAC FAC SNR SP

TAC = Type approval code
FAC = Final assembly code
SNR = Serial number
SP = Spare

To check the phones Software revision type-
*#0000#
Information you get from the Software revision-
V 05.31
18-02-99
NSE-3
1ST Line = Software revision
2ND Line = The date of the software release
3RD Line = Phone type

To enter the service menu type-
*#92702689# (*#WAR0ANTY#)
Serial number (IMEI)
Production date (MM/YY)
Purchase date (MM/YY) You can only enter the date once.
Date of last repair (0000=No repair)
Transfer user data to another Nokia phone via Infra-Red

Clock Stopping

To check weather your SIM Card supports clock stopping type-
*#746025625# (*#SIM0CLOCK#)

Revealing the Headphone and Car-Kit menus

Please note that if you do these next tricks, the new menus can't be erased without retoring the factory default settings. To do these tricks you need to short-circuit the pins on the bottom of the phone next to where you plug in you charger.

1. To activate the "Headset" menu, you need to short-circuit pins "3" and "4". After a short time the word "Headset" will be shown in the display. Menu 3-6 is now enabled.
2. To activate the "Car" menu, you need to short-circuit pins "4" and "5". After a short time the word "Car" will be shown in the display. Menu 3-7 is now enabled.

THE REBOOT TRICK
This should work on all software versions of the 6110.
1. Go to the Calendar (Menu-8)
2. Make a note or reminder.
3. Enter some text into the edit box.
4. Hold "Clear" until the whole text is cleared, then press "Back".
5. Press "0". The main screen will now be showing but a space appears on the screen. (you can't see it)
6. Enter 4 digits (e.g. 1234).
7. Use the down arrow to move the cursor to the left side of the numbers and the space (Down arrow twice).
8. Now enter 6 digits and press the call button.

Wait for a few seconds, the screen should start to flash and reboots. It should alsowork on other menus like the "Profiles" menu.

EFR CALL QUALITY
To activate EFR (Enhanced Full Rate) Enter the code-
*3370#
This improves call quality but decreases batterylife by about 5%
To deactivate it, Enter the code-
#3370#

THE JAMES BOND TRICK
If you short-circuit theleft middle and right pins on the bottom of the phone with all connections touching each other, the Nokia software hangs! The profile "Headset" will be activated. Before you do this just activate the "Automatic Answer" in the headset profile and set the ringing volume to "Mute". Now you can use your phone for checking out what people are talking about in a room. Just place it under a table in a room and call it. The phone receives the call without ringing and you can listen to what people are saying.

NETWORK MONITOR

There is a hidden menu inside your Nokia phone. If you want to activate it, you'll have to re-program some chips inside of your phone.
Check your software version. You can only continue if you have v4.33, v4.73 or v5.24.
Take apart the phone.
De-solder the EEPROM (ATMEL AT 24C64).
Read out the data with an EEPROM programmer and save it to a file (Backup).
If you have v.33 or v4.73, change the address "03B8" from "00" to "FF".
If you have v5.24 then change the address "0378" from "00" to "FF".
Write the new data to the EEPROM and solder it back to the phone,
Power on your phone and you should have "Netmonitor" enabled.
The Network Monitor gives you the following information.

Carrier number
MS RX Level in DBM
Received signal quality
MS TX power level
C1 (Path loss criterion, used for cell selection and reselection). The range is -99 to 99.
RTL (Radio link timeout).
Timeslot
Indication of the transmitter status
Information on the Network parameters.
TMSI (Temporary Mobile Subscriber Identity).
Cell identification (Cell ID, Number of cells being used).
MCC (Mobile country code)
MCN (Mobile network code)
LAC (Location area code)
Ciphering (On/Off)
Hopping (On/Off)
DTX (On/Off)
Discard cell barred information

CHECK SIM-LOCK
Note - If you bought your Nokia on UK Vodafone or UK Cellnet you do not need to check this because they both transmit on GSM900, and they don't lock the phones. However if you bought your phone on UK Orange or UK One2one your phone may be blocked. The reason is that they both transmitt on GSM1800. To make a call on GSM1800 you need what is known as a "Dual band" phone. A dual band phone is able to transmit on both GSM900 and GSM1800, so they lock the phones so you can't use it with any other network simcard. If you find that your phone is locked you can try different software to unlock it. (we havn't found one that works yet), or you can ask your service provider who will gladly exchange the 10 digit code for about £35.
This is how to check the status of the 4 different locks. Aslo don't try entering the wrong number, because after 3 times it will block the phone for good.

There are 4 different locks on your Nokia phone.
COUNTRY-LOCK
NETWORK-LOCK
PROVIDER-LOCK
SIMCARD-LOCK
The code to read out the sim-lock status of your phone is

#PW+(MASTERCODE)+(Y)#
# = DOUBLE-CROSS
W = PRESS "*" THREE TIMES
P = PRESS "*" FOUR TIMES
+ = PRESS "*" TWO TIMES
MASTERCODE = 1234567890
Y = NUMBER 1 TO 4
The master code is a secret code. The code has 10 digits, To read out the sim-lock status you can enter every combination you want!
"Y" Shows the status of the network-lock. Here you can enter a number from "1" to "4". The "4" is for the sim-card lock.

SIM-LOCK CHECKS
#PW+1234567890+1# = GIVES PROVIDER-LOCK STATUS
#PW+1234567890+2# = GIVES NETWORK-LOCK STATUS
#PW+1234567890+3# = GIVES COUNTRY-LOCK STATUS
#PW+1234567890+4# = GIVES SIM-CARD-LOCK STATUS.
 

(c)2010 IT TWEAKS.Created by Nashim|WebsiteLeadtrance